Capture the Ethereal: How I Use Snapseed’s 'Retrolux' for Atmospheric Landscapes
I often think "retro" filters get a bad rap. They’re usually associated with heavy-handed, sepia-toned gimmicks that make a photo look like a 1970s Polaroid found in a dusty shoebox. But hidden inside these tools are subtle sliders that can transform a flat, hazy winter shot into a moody, ethereal masterpiece.
Today, I’m focusing on Snapseed’s Retrolux tool. It’s not just for vintage selfies—when used correctly, it adds a soft, misty quality to Irish landscapes that mimics the dreamlike atmosphere of the Wicklow Mountains in the morning fog.
N.B. This tool is one I only use very occasionally when I have an image that it particularly works with. Don’t overuse it ;)
Why I Use Retrolux for Landscapes
The "Retrolux" filter is essentially a combination of colour grading, light leaks, and texture overlays.
For landscape photography, especially those misty, grey Irish winter days I encounter so often, I'm not interested in making the photo look "old." I am interested in the atmosphere. The filter naturally lifts the blacks (making shadows look softer) and adds a glow that softens harsh digital edges.
My Personal Twist: I use it to embrace the haze, not fight it. However, the default settings are usually way too aggressive for my taste. The secret lies in completely stripping back the "damage" (scratches) and fine-tuning the contrast to keep the details sharp.
Step-by-Step: My Ethereal Landscape Workflow
Open your photo in Snapseed (available on iOS and Android) and follow along with my exact workflow to turn a dull grey shot into a moody work of art.
1. The Initial Setup
Before I touch Retrolux, I do my basic housekeeping.
Go to Tune Image.
I adjust the Ambiance and Highlights just enough to ensure the sky isn't blown out.
Note: I never over-sharpen at this stage; Retrolux works best on a softer image base.
2. Enter the Retrolux Tool
Retrolux Tool
Don’t panic if Snapseed applies something heavy to begin with!
Go to Tools > Retrolux. Snapseed will automatically apply a random "style" (usually something heavy with scratches). Don't panic! I’m going to strip this down to the essentials.
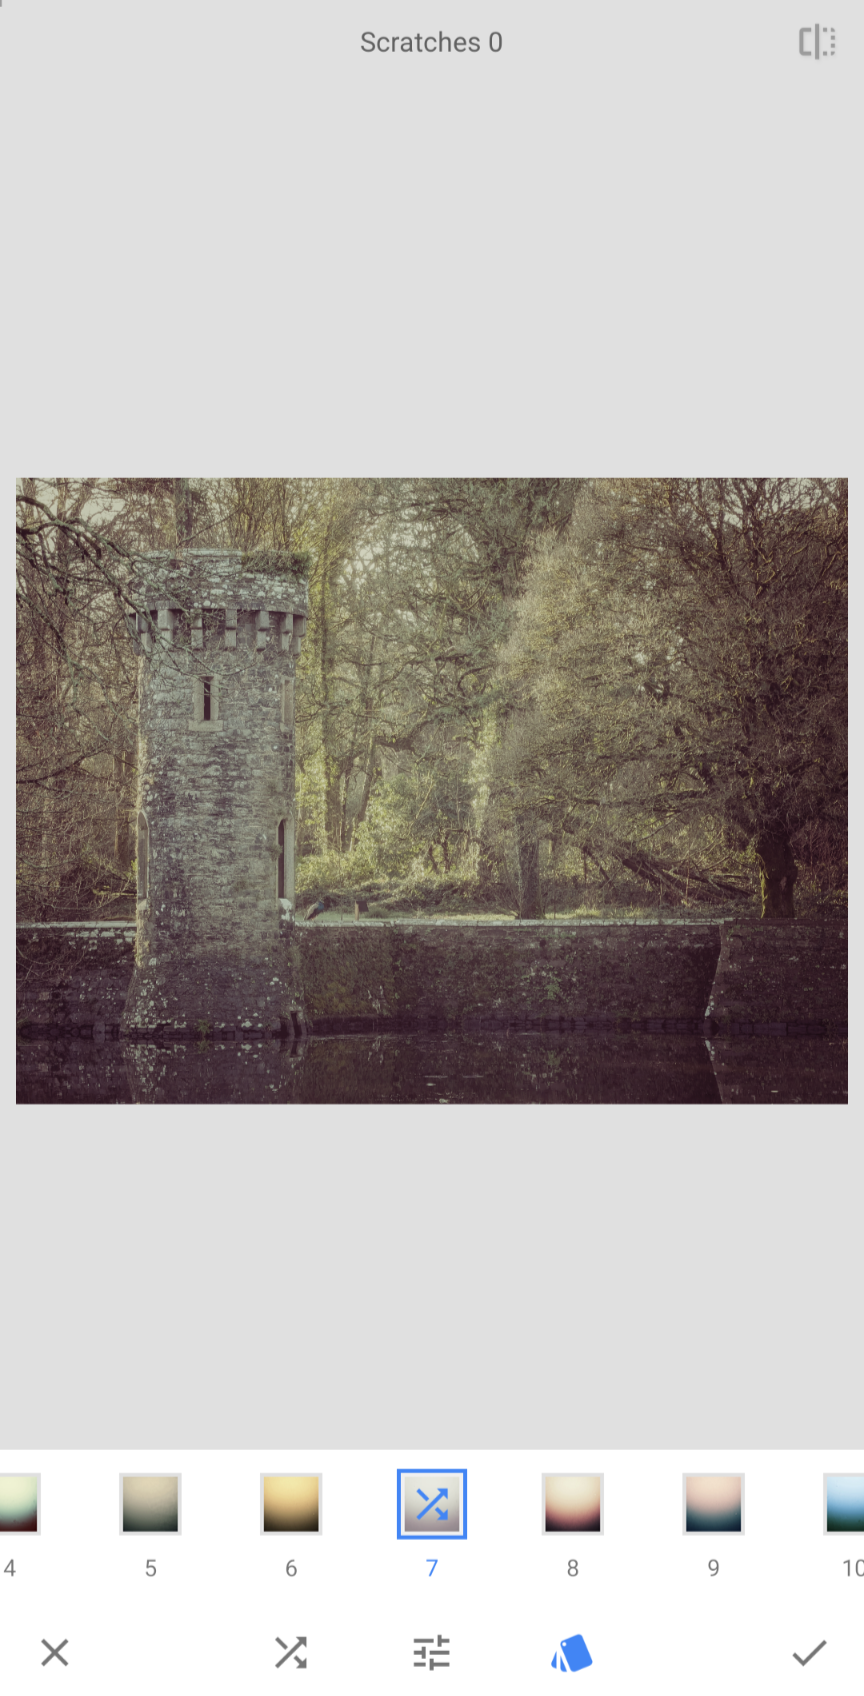
3. Choose Your Style
Tap the Style Cards (the icon with the cards) at the bottom.
I usually stick to Style 5, 7, or 9 or 12. These tend to have the most natural colour shifts for nature photography.
I avoid the higher numbers unless I'm looking for a really extreme colour shift (but don’t always count them out).
4. The Critical Adjustment: Removing the "Junk"
This is my non-negotiable step for clean landscapes.
Tap the Adjust icon (the sliders in the middle).
Select Scratches.
Slide all the way to 0.
I want the mood, not the damage. Scratches on a beautiful shot of Glendalough just look like I have a dirty lens. I always get rid of them completely.
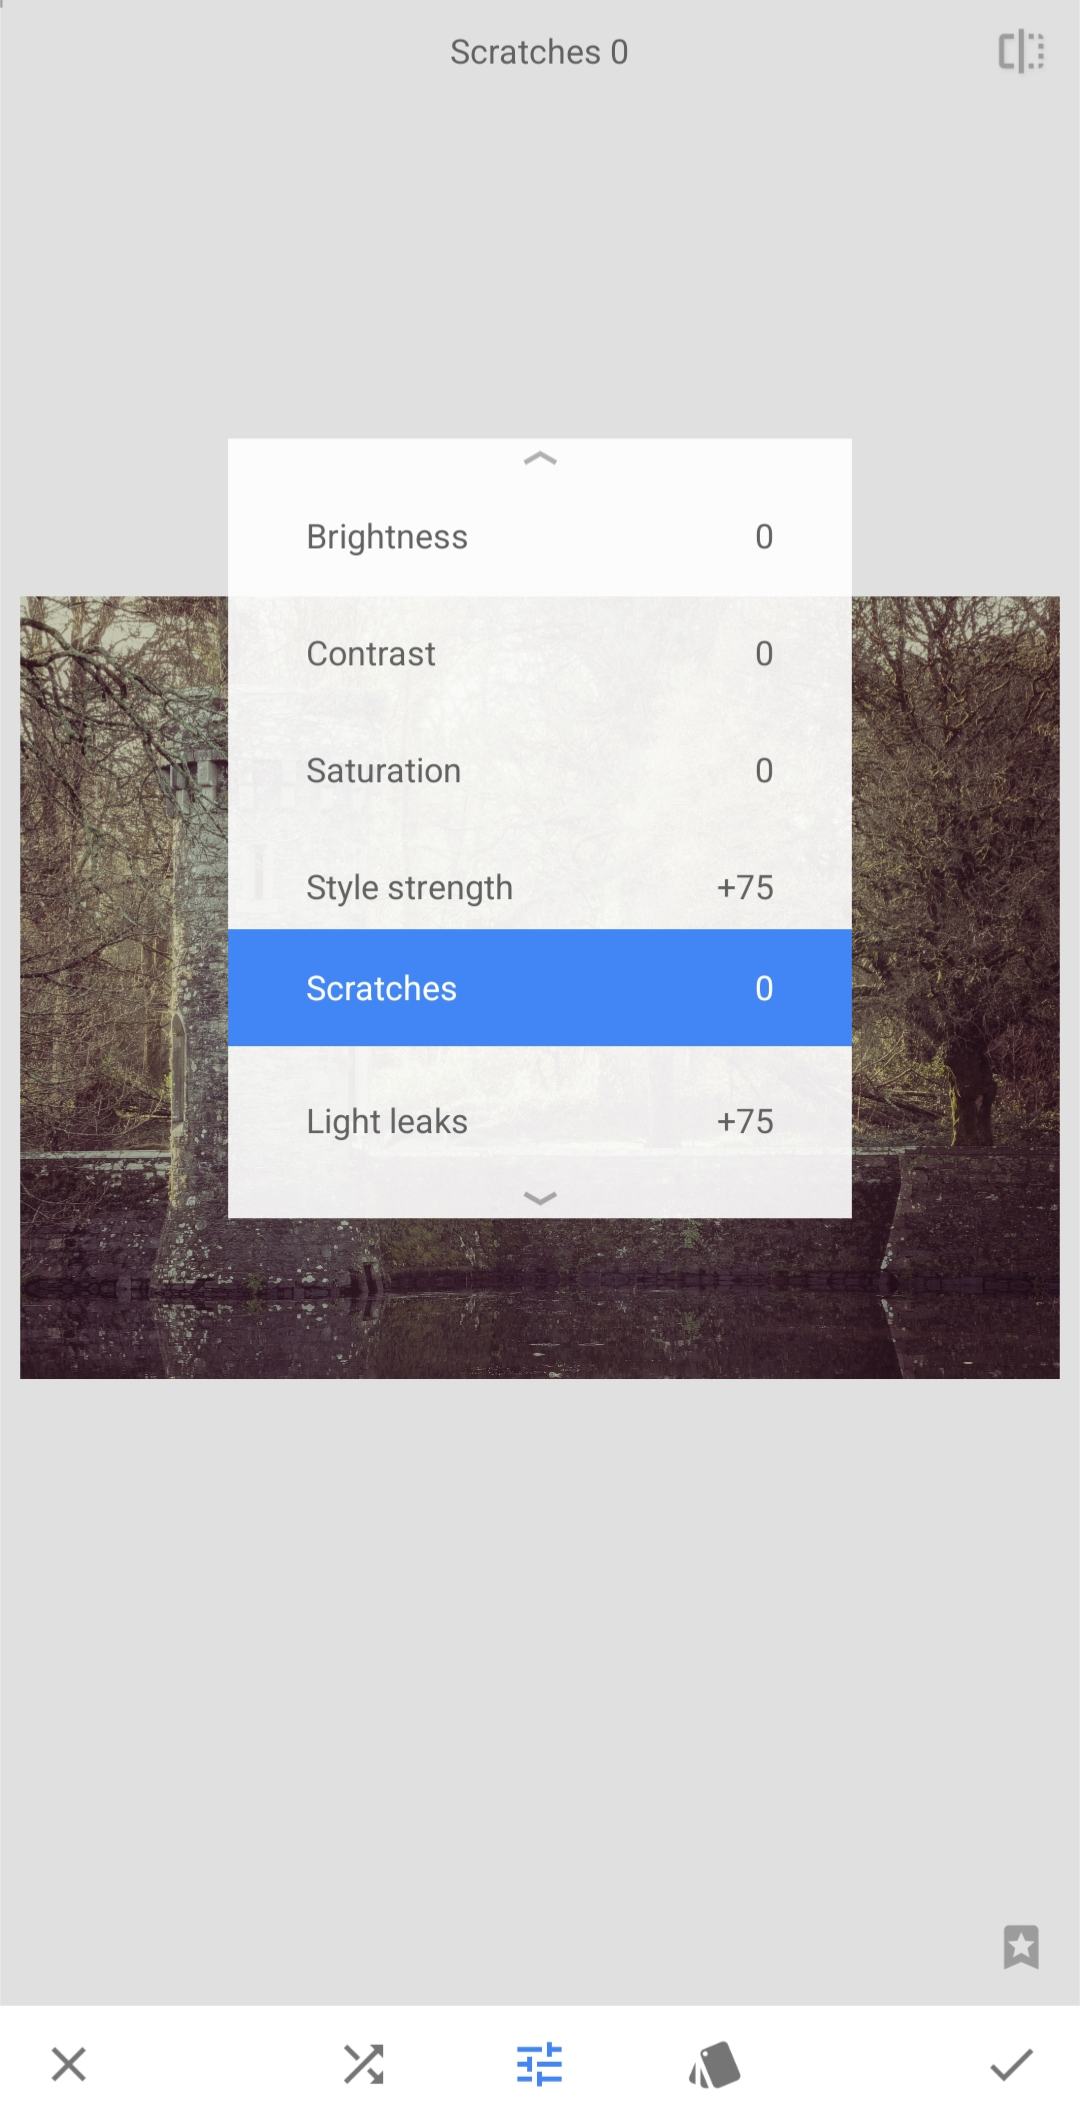
“Scratches”
Slide that right down to 0!!!
5. Dialling in the Atmosphere
Now that the image is clean, I play with the light.
Light Leaks: I keep this low (between +5 and +15). I want a subtle shift in light that mimics the sun breaking through mist, not a giant orange blob covering a tree.
Brightness: I adjust this to taste, but usually, a slight decrease adds moodiness.
Saturation: I’m careful here. Retrolux often over-saturates. I usually dial this back to -10 or -20 for a more bleak, authentic wintery Irish vibe.
6. The Contrast Trick
As I mentioned, Retrolux can make an image look "flat" or "muddy" because it lifts the shadows. To counter this, I use a specific trick:
Select Contrast within the Retrolux menu.
Push it up (try +15 to +25).
I find this restores the definition in the trees, rocks, or mountains. It ensures the photo looks misty but not blurry. It anchors the image and keeps the focal point sharp.
Pro Tip: The Shuffle is Your Friend. If I'm not feeling the specific Light Leak pattern (maybe the light is hitting a tree trunk weirdly), I tap the Shuffle icon (the crossing arrows). This randomizes the placement of the light leaks without changing my sliders too much. I keep tapping until the light falls naturally in a corner or empty part of the sky.
When I Use This Technique
This edit isn't for a bright, sunny summer day on Dollymount Strand. I find it shines in specific conditions:
Hazy Winter Mornings: When the air is thick with moisture.
Forest Photography: I love using this in Avondale or Ticknock to make the light filtering through trees look soft and painterly.
Overcast Skies: When the sky is a flat white, Retrolux adds a texture and warmth that makes the "boring" sky look intentional and artistic.
The Verdict
Retrolux is a misunderstood beast. By removing the scratches and boosting the contrast, I’ve found it unlocks a powerful atmospheric generator that turns the "bad" Irish weather into my greatest aesthetic asset.
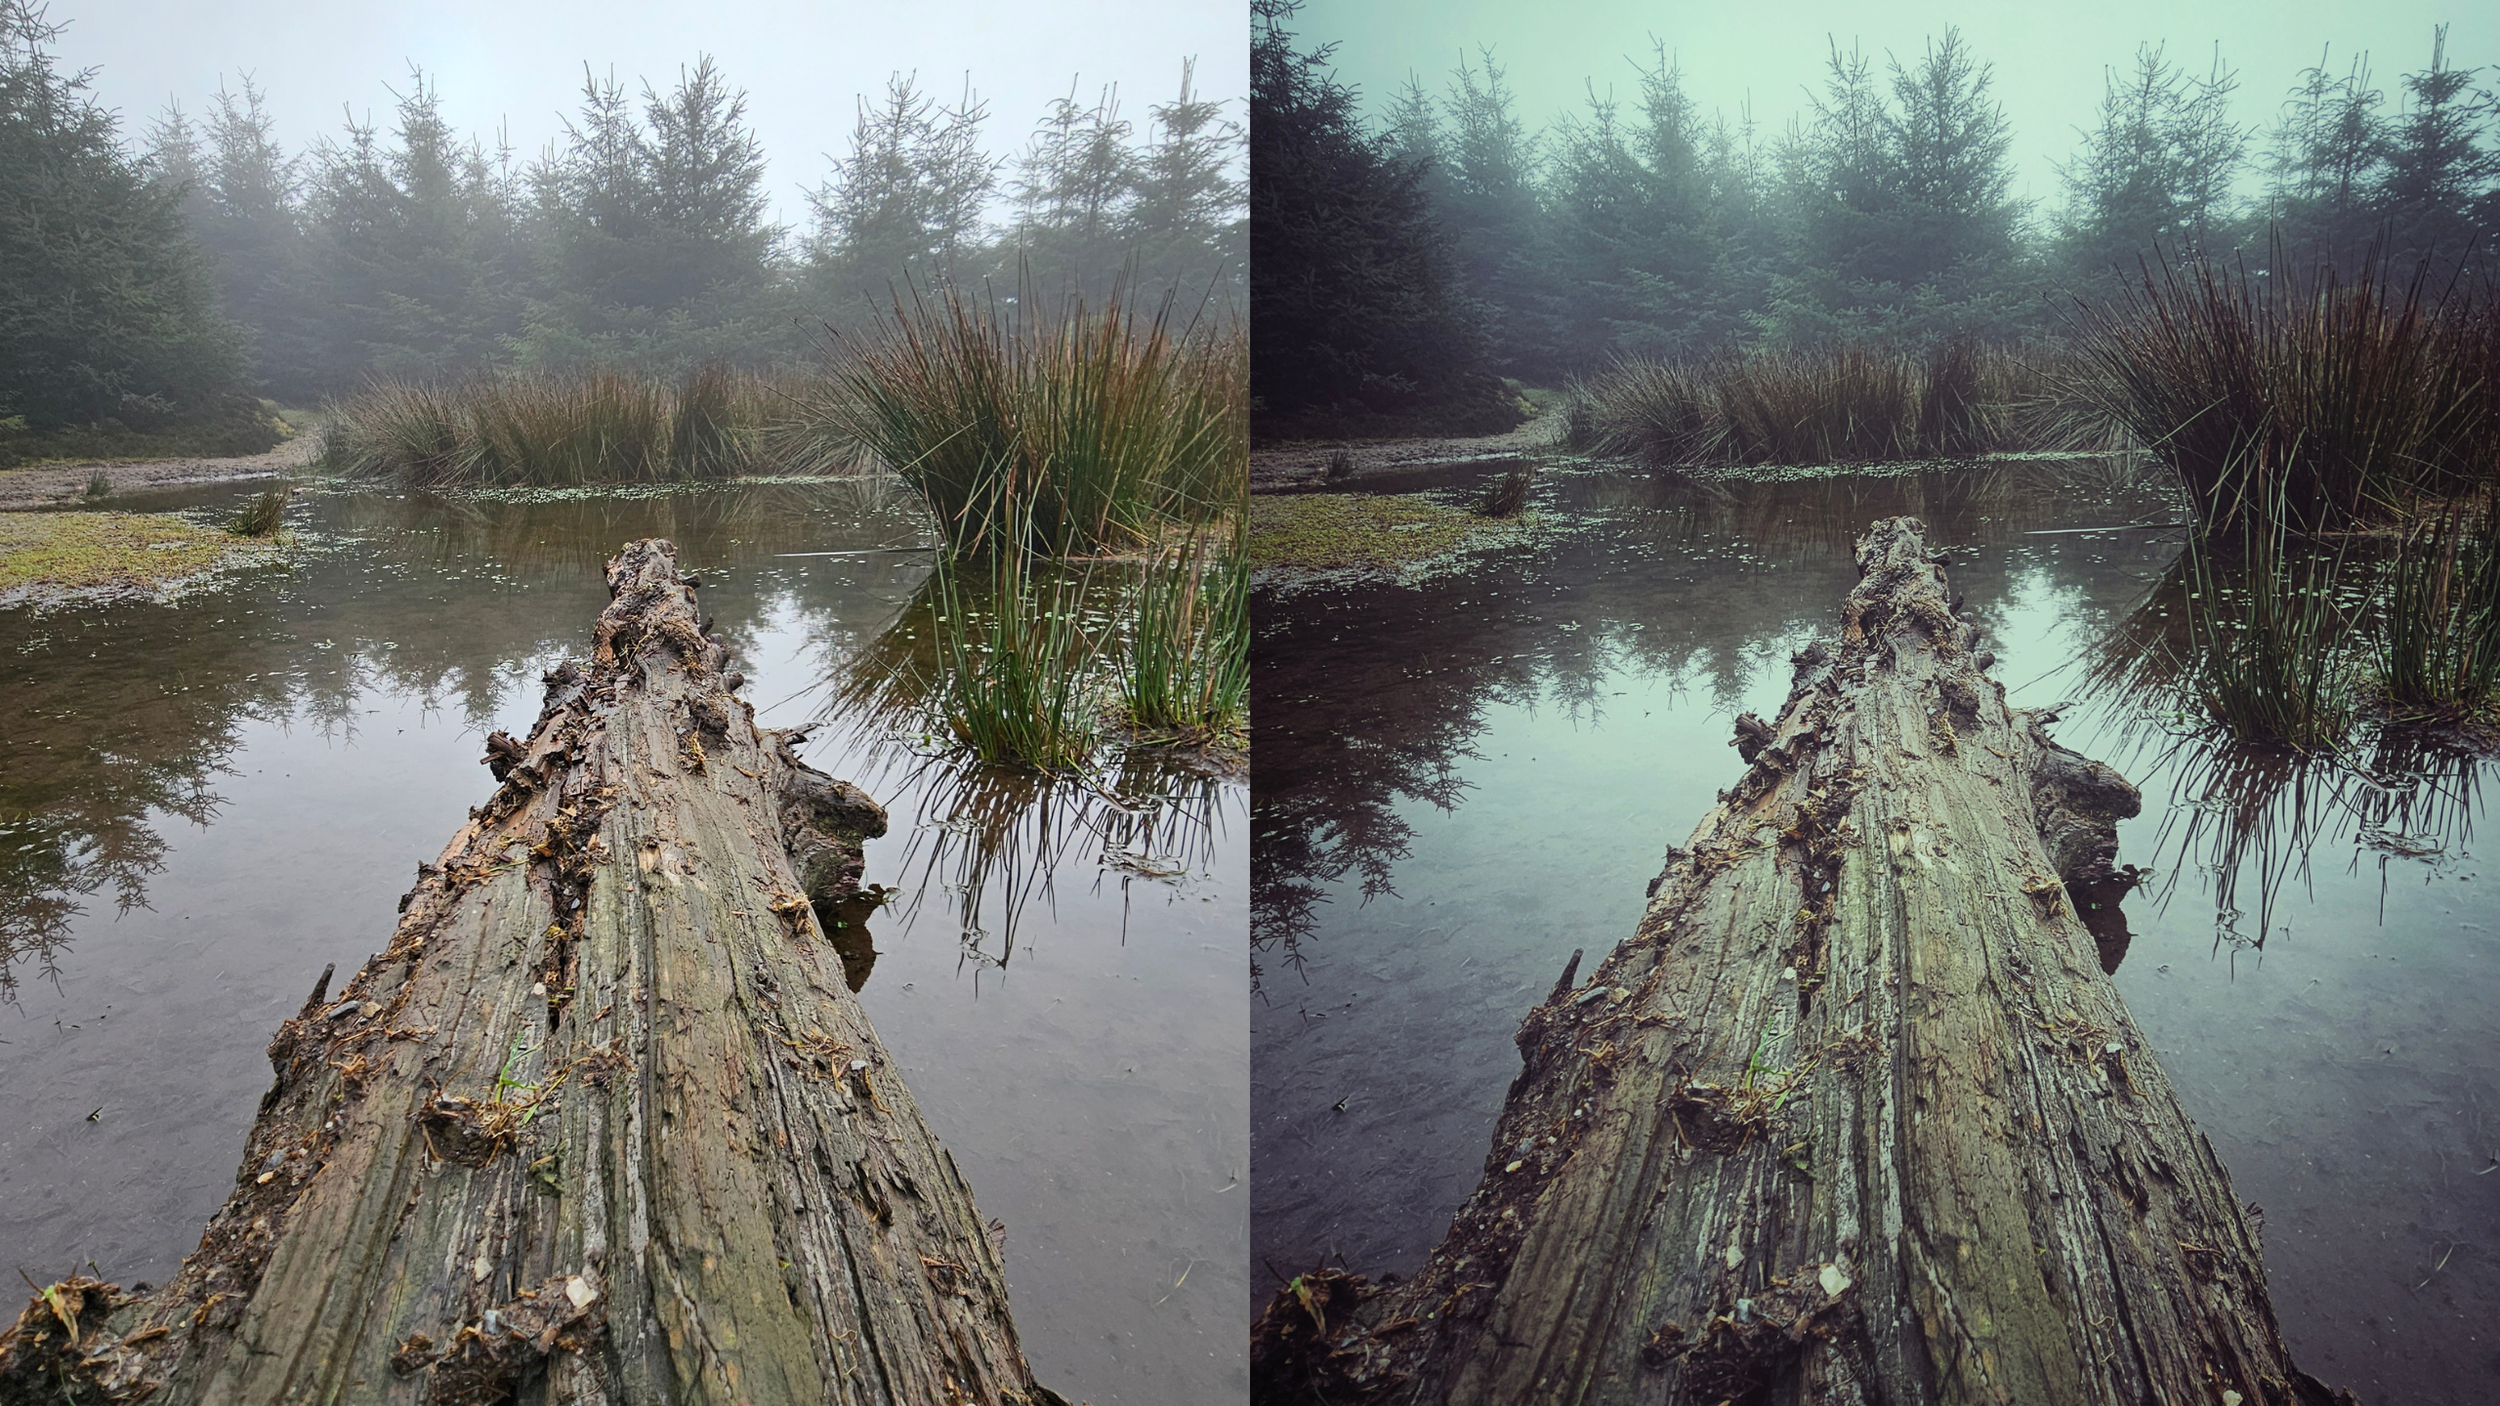
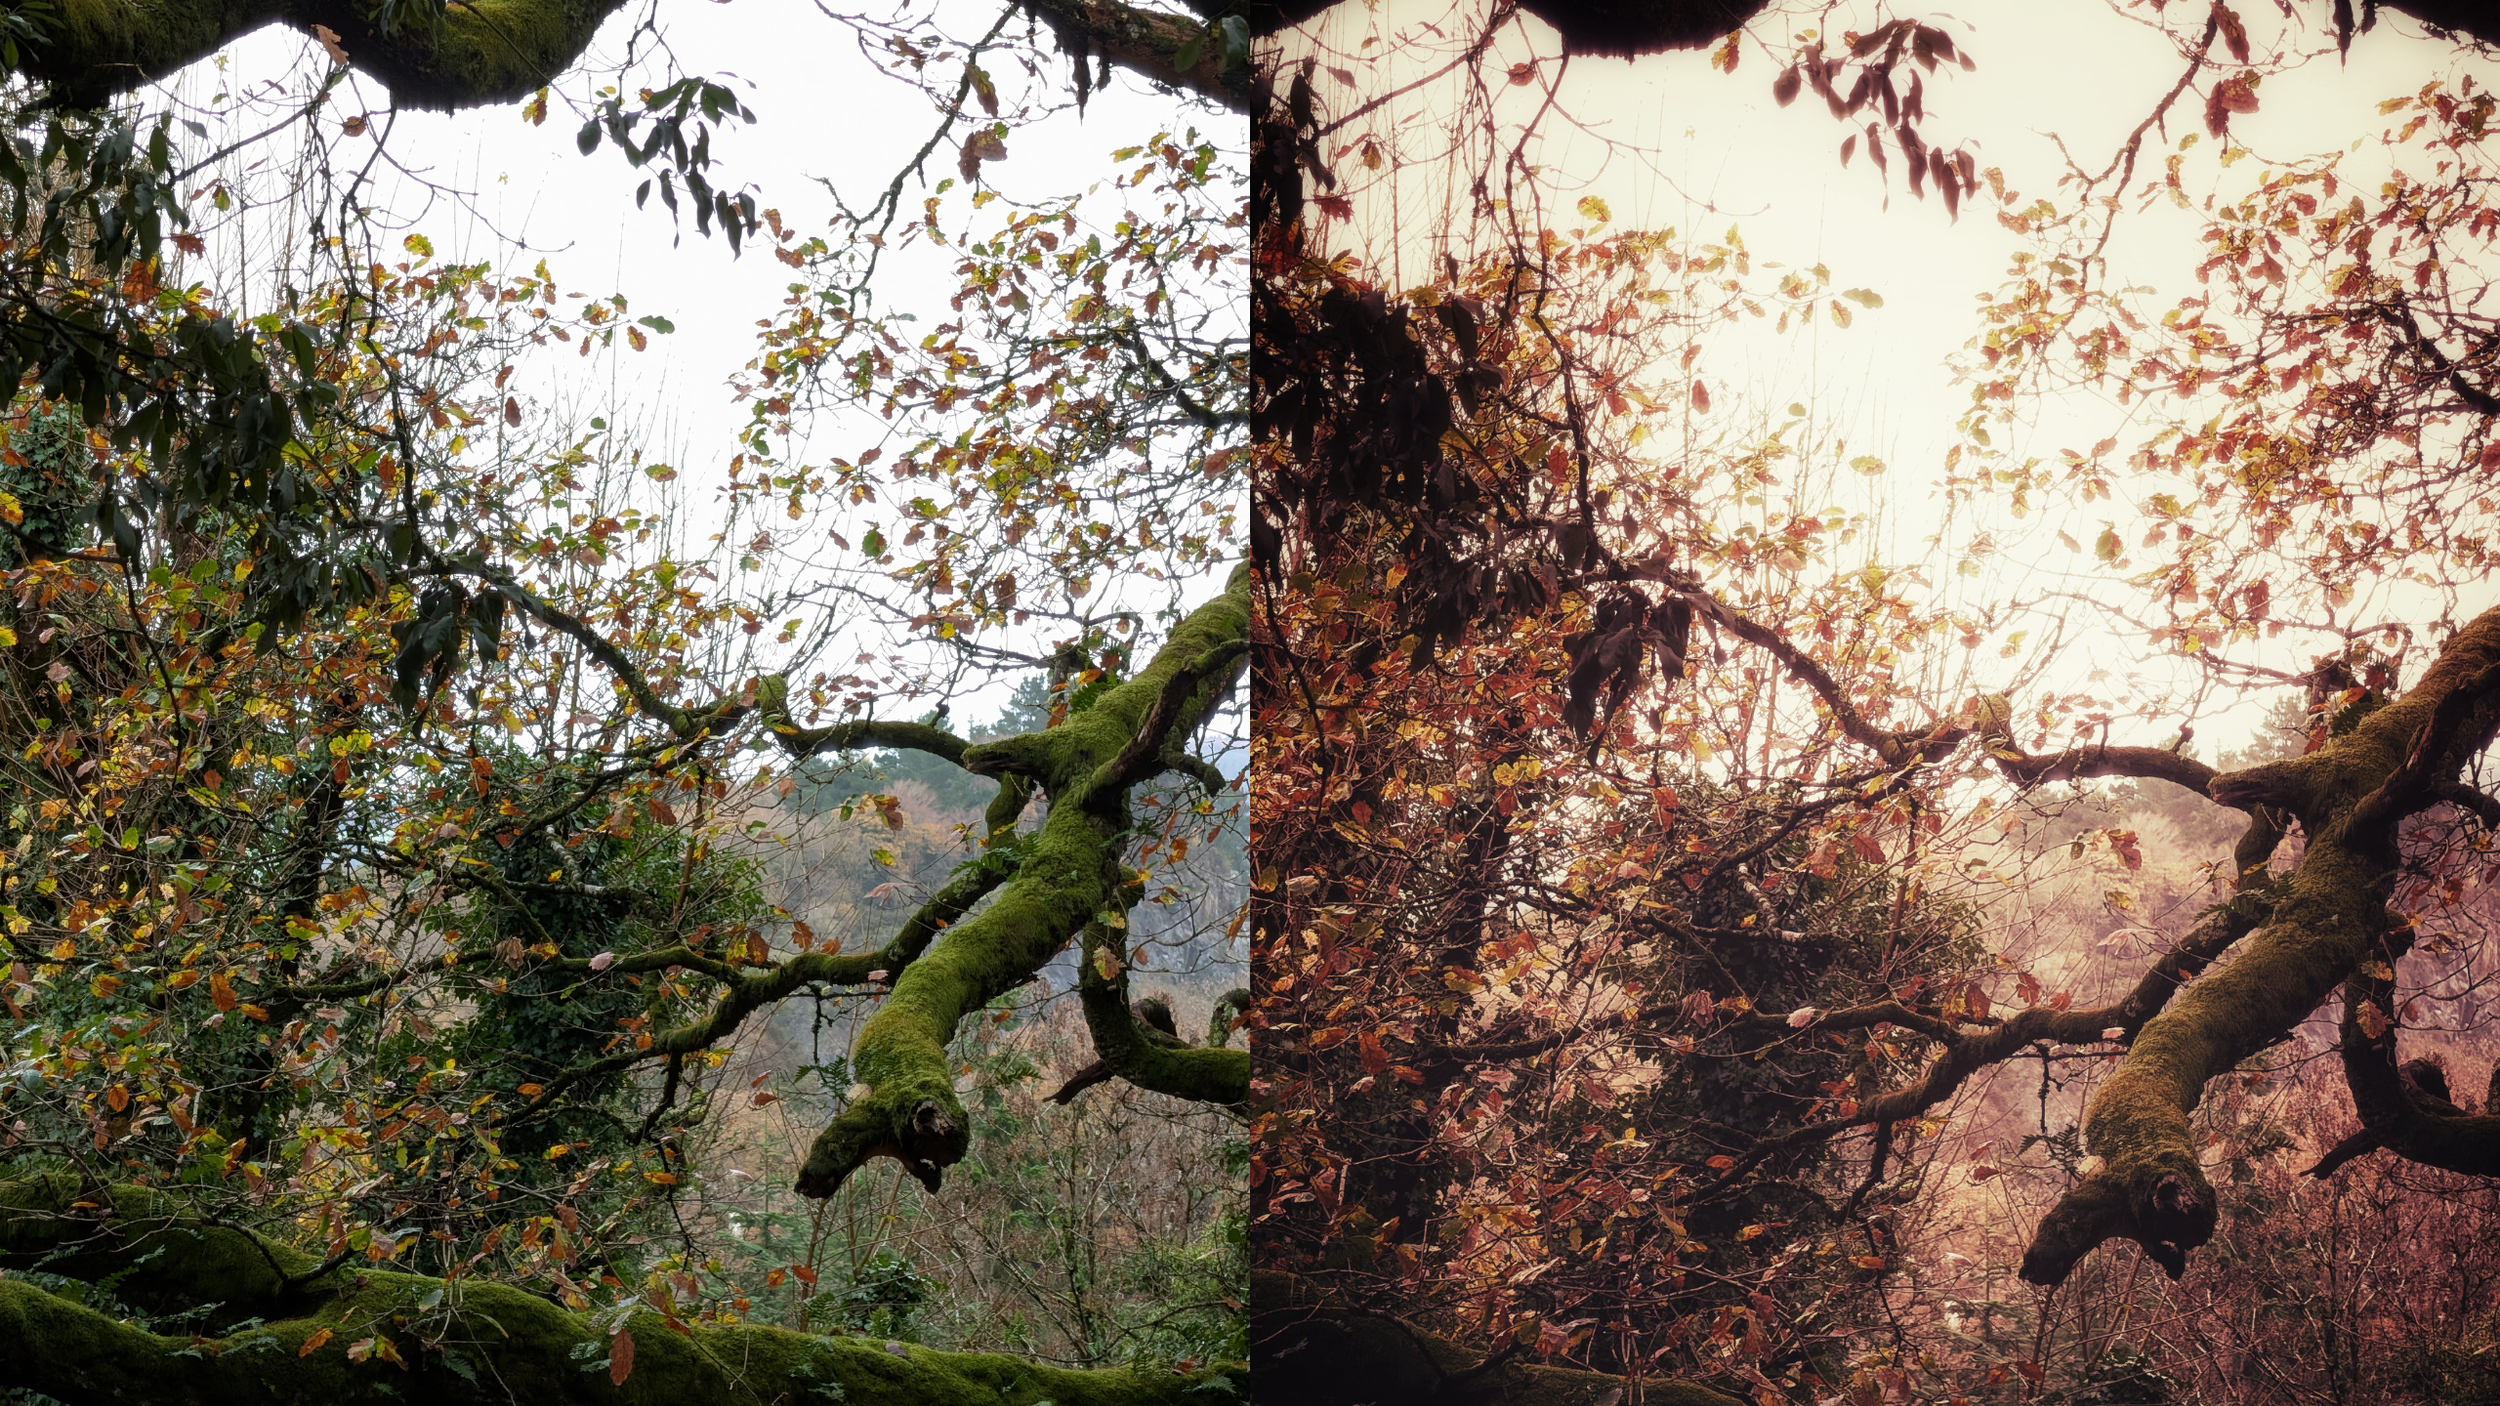
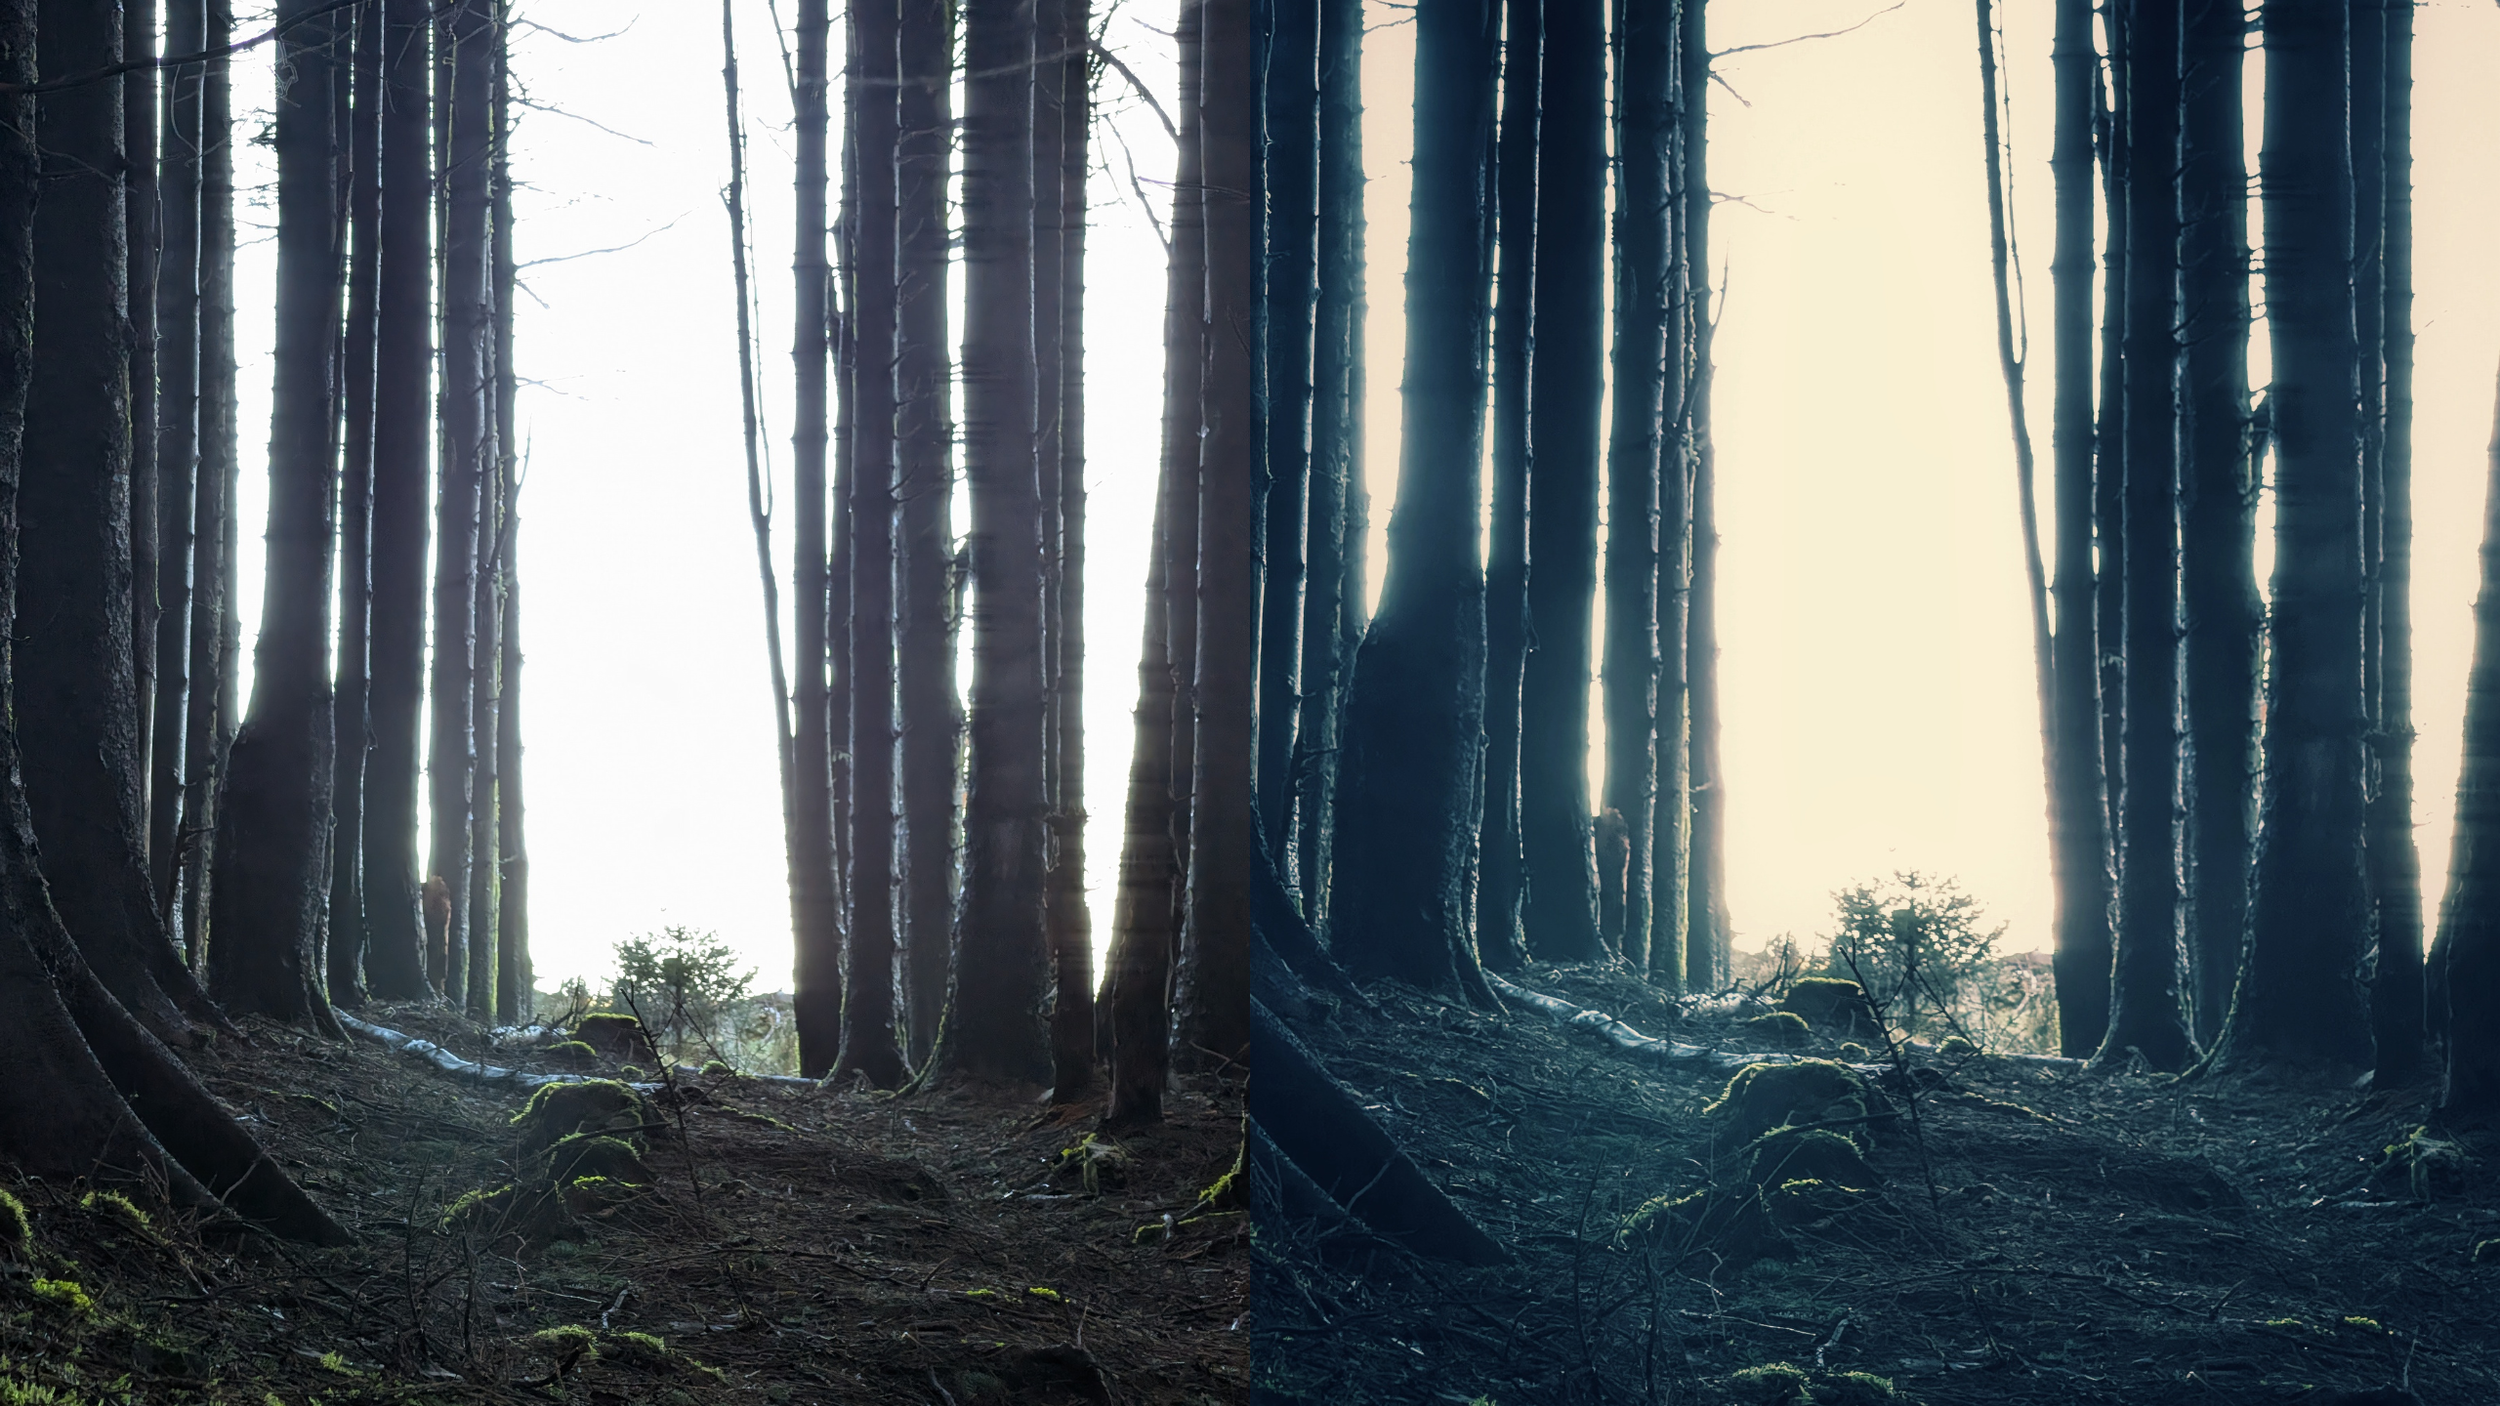
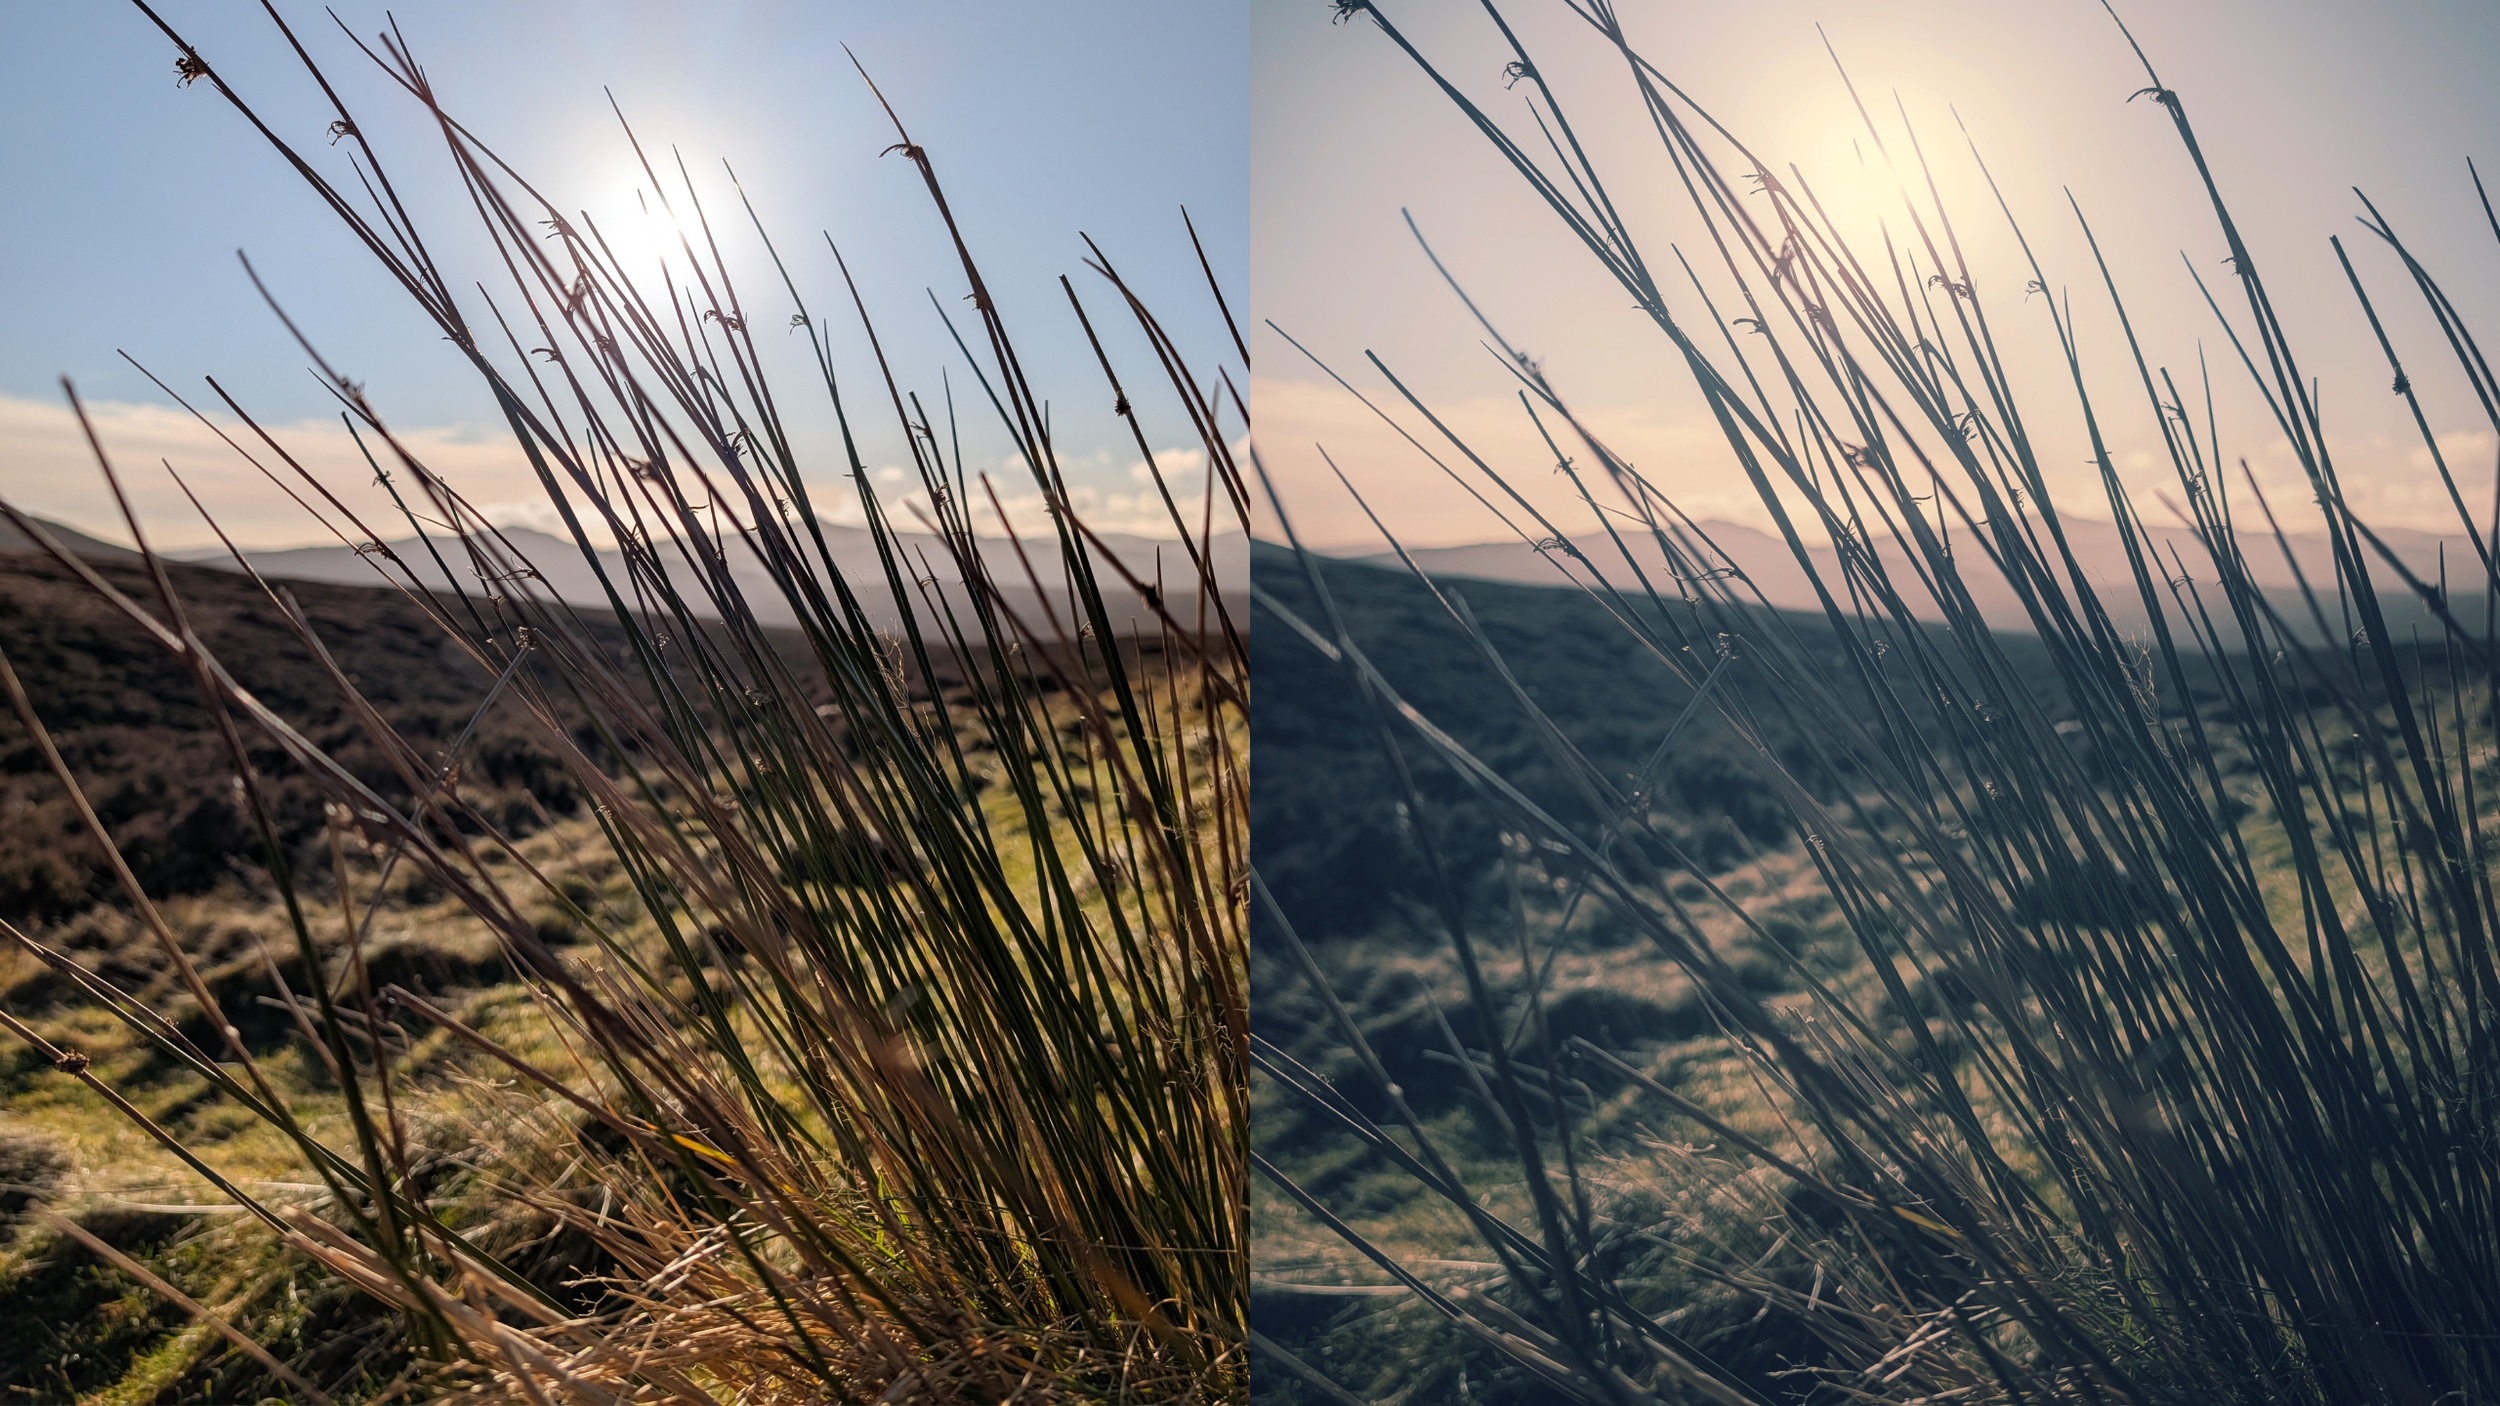
Examples
Here are some examples before and after shots of photos where I used Retrolux in combination with other tweaks in Snapseed. As I say, I use it sparingly because it can dramatically alter the original image, but in order to convey a particular feeling or mood associated with the photo, it has its place.