
The Secret Sauce for Dreamy Photos: A Guide to Snapseed's Glamour Glow
If there is one tool in the free Snapseed app that instantly transforms a standard smartphone snap into something that looks like a professional print, it’s Glamour Glow.
When we shoot with modern smartphones - whether it’s a Google Pixel like me or the latest iPhone - the software often tries to be too helpful. It sharpens every edge and boosts every contrast, sometimes leaving us with an image that feels a bit "digital," "crunchy," or harsh.
That’s where Glamour Glow comes in. Think of it as a digital diffusion filter. It adds a soft, ethereal atmosphere to your shots, mimicking the romantic look of vintage photography. Here is how to master it subtly without making your photos look fake.
How to Use Glamour Glow: Step-by-Step
Using this tool is incredibly simple, but the magic lies in the manual adjustments.
Open your photo in Snapseed.
Tap Tools at the bottom of the screen.
Scroll down to the filters section and select Glamour Glow.
Select a Preset: You will see numbers 1 through 5 at the bottom.
1-3: Keep the colour more true to the original tones.
4: Has a cooler tone. I use this one a lot for winter photography.
5: Has a warmer tone - perfect for the autumn.
Adjust the Sliders: This is crucial! Swipe your finger up and down on the screen to access the menu:
Glow: The intensity of the softness.
Saturation: The vibrancy of the colors.
Warmth: How yellow/orange or blue the light feels.
Swipe left or right to increase or decrease these values.
Tap the Checkmark to save.
Why I Use It
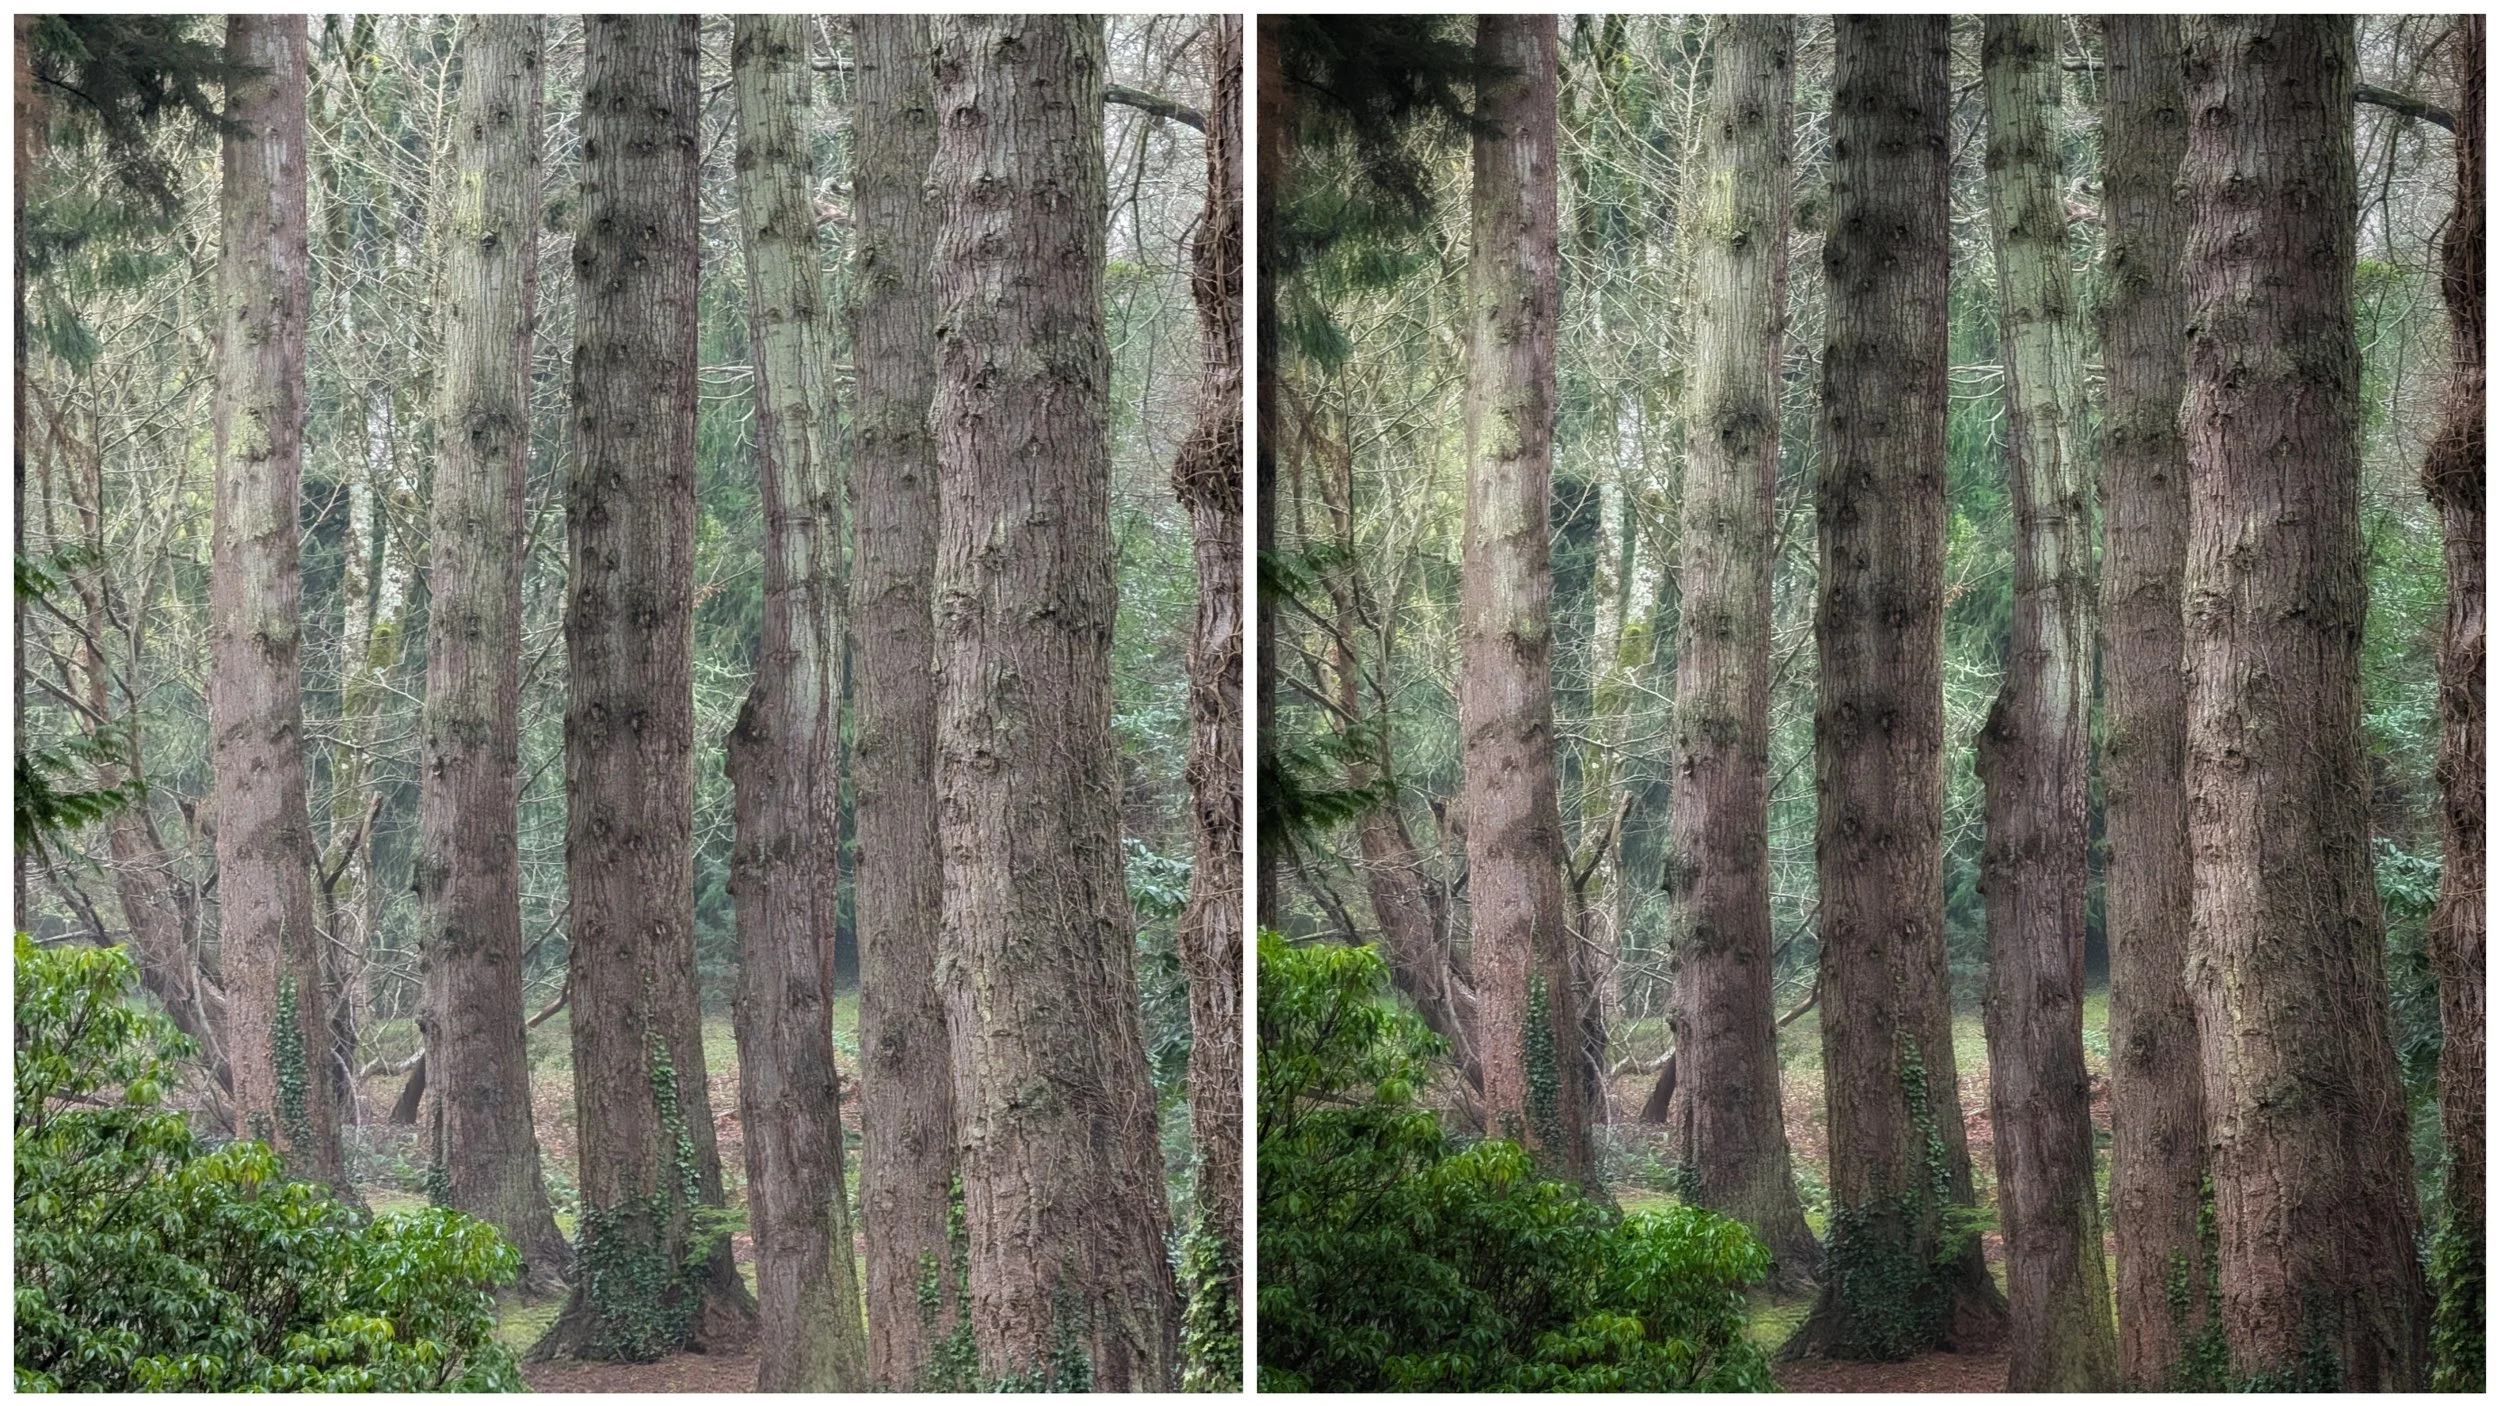
As a smartphone photographer, the biggest enemy is often "digital sharpness." When I’m out in a dense forest in Wicklow or shooting macro shots of fungi on the forest floor, I want the image to feel organic and atmospheric, not clinical.
I use Glamour Glow specifically to soften the image.
Smartphones are amazing, but they often over-sharpen leaves and grass, making them look jagged. A touch of Glamour Glow (usually between +20 and +30) melts those harsh edges away. It gives the light a "blooming" effect, making it look like the sun is actually radiating through the trees rather than just being a white spot on a screen. It’s not something I use on every shot - only select images - but it’s a useful tool to have in the kit.
The "Danger Zone": Watch Your Saturation!
There is a catch. By default, increasing the Glow also tends to pump up the colours. If you aren't careful, your nice moody landscape can quickly turn into a neon cartoon.
My Rule of Thumb: If I increase the Glow, I almost always decrease the Saturation.
Example: If I set Glow to +35, I will drop Saturation to -15 or -20 within the same tool. This keeps the dreamy lighting but maintains realistic, natural colours.
Best Use Cases for Glamour Glow
This tool isn't for every photo (avoid it on architectural shots where you want crisp lines), but it works wonders here:
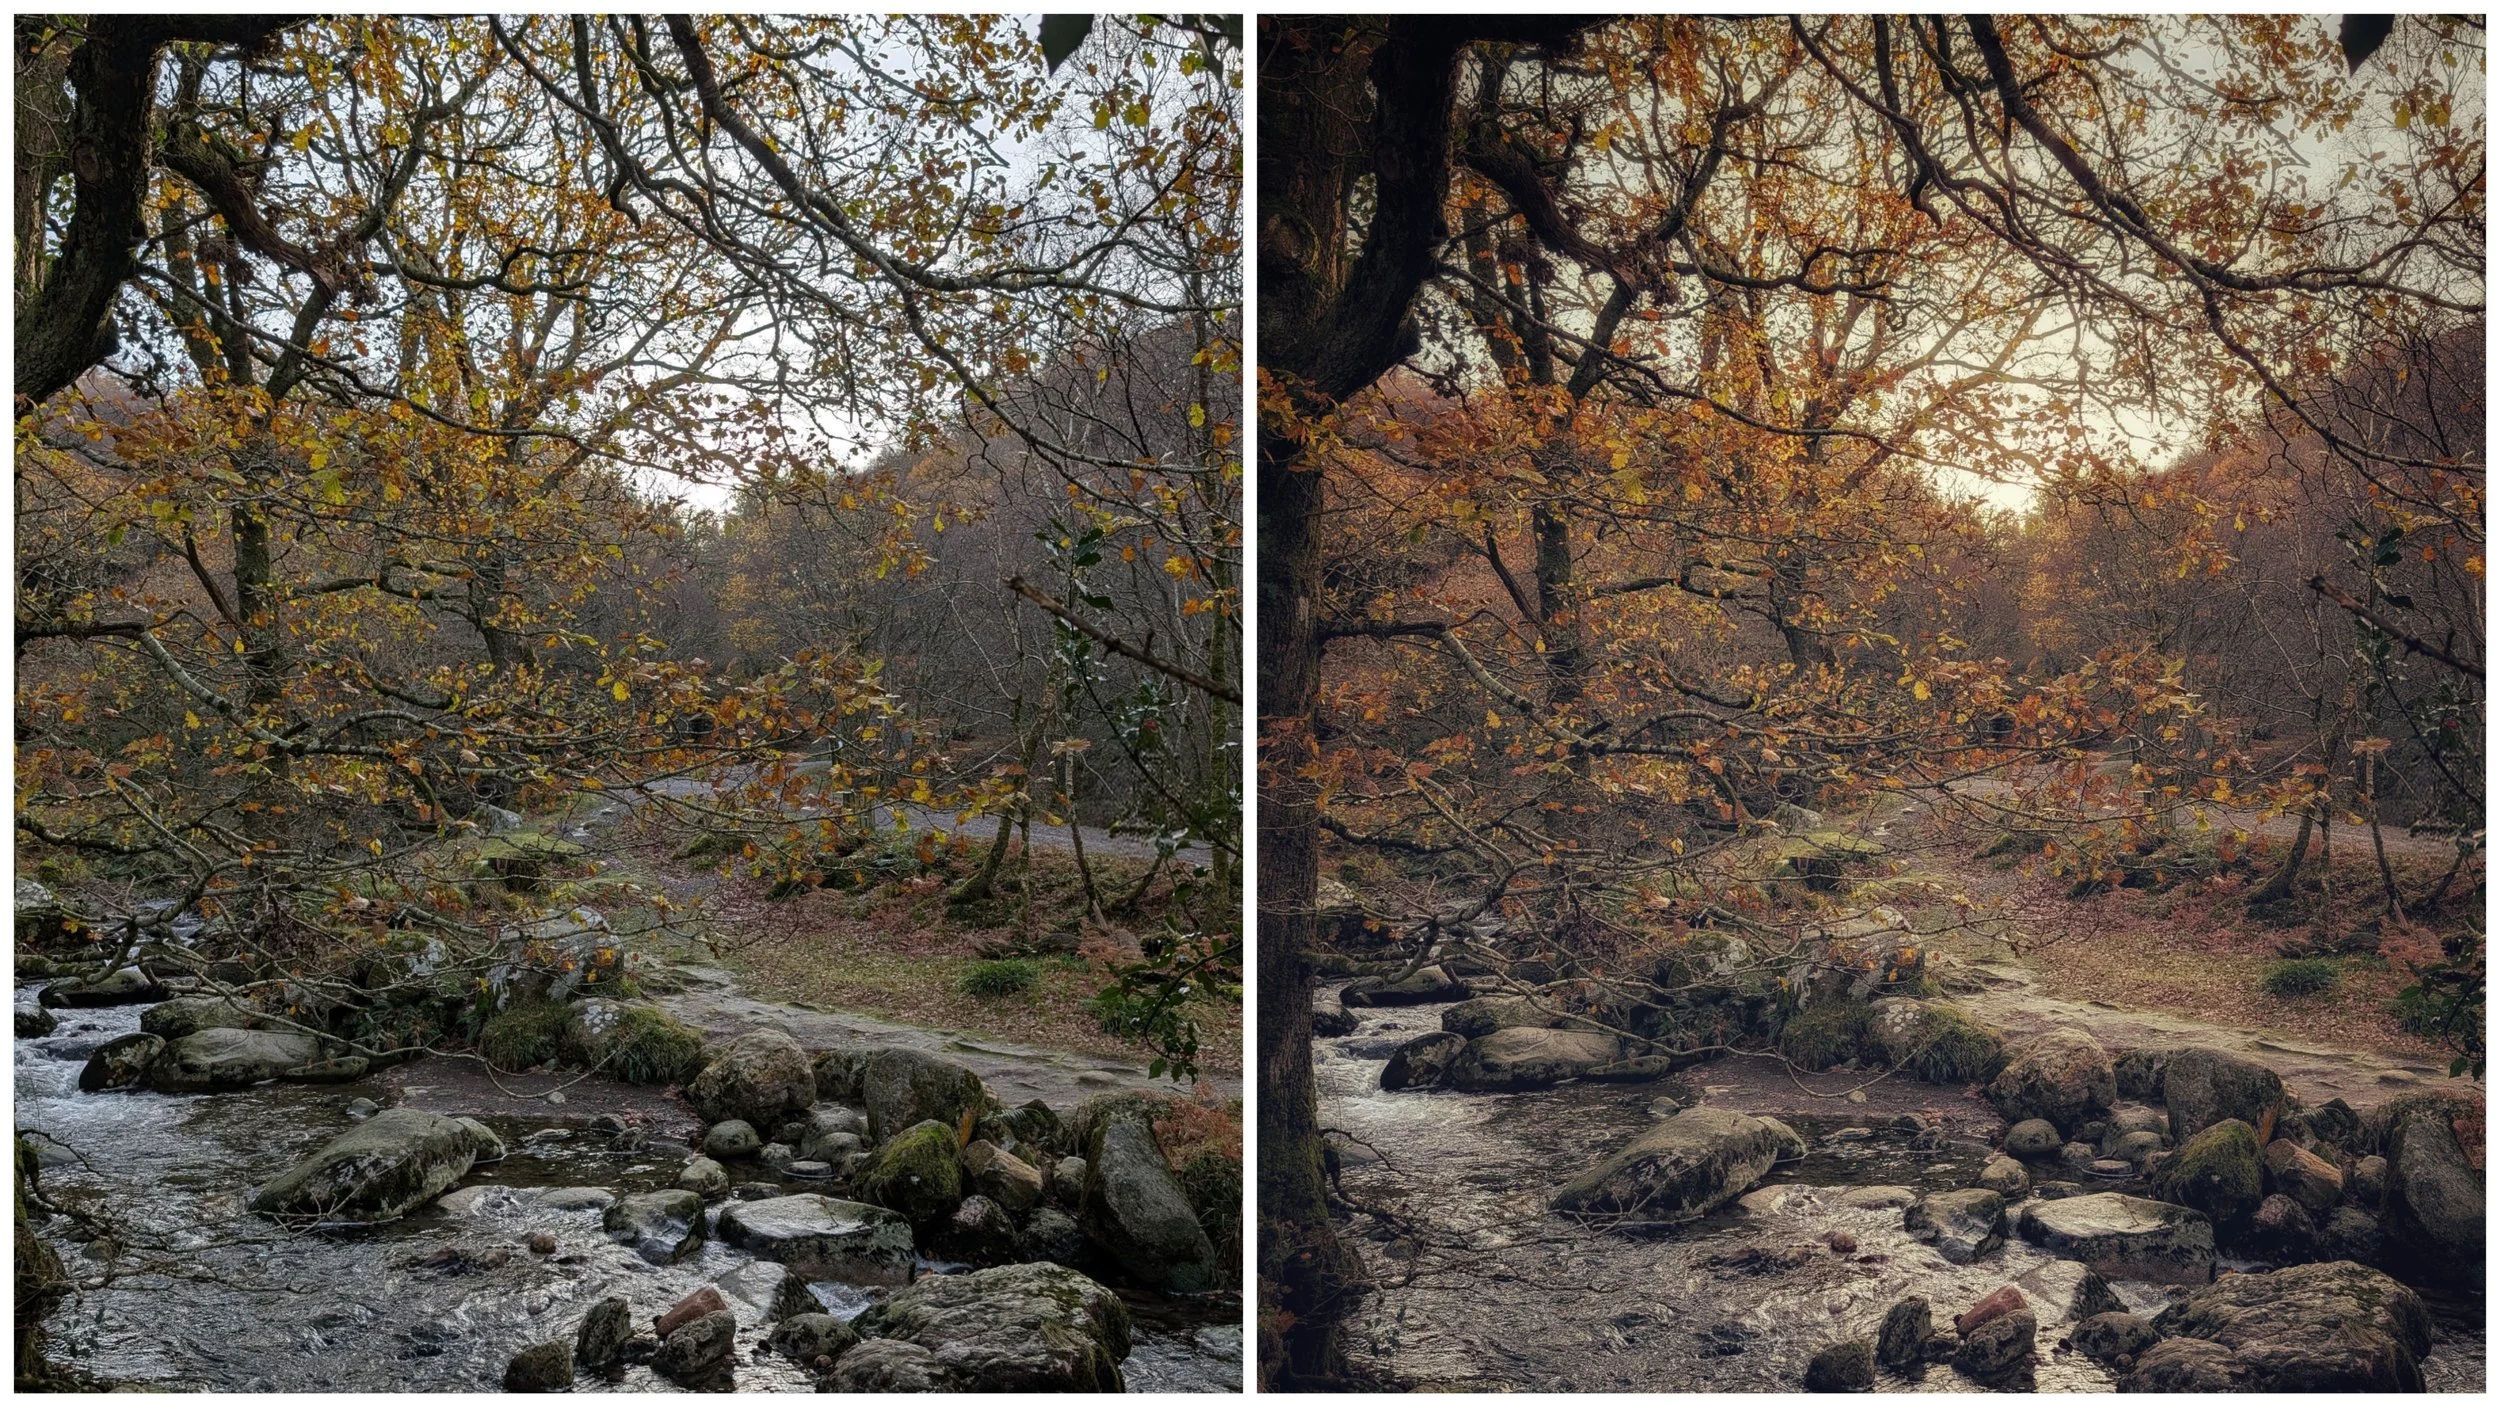
Misty Landscapes: If you are shooting the Irish coast or a bog on a rainy day, this tool enhances the fog, making it look thicker and moodier.
Macro Nature: For mushrooms, moss, or flowers, it creates a fairy-tale vibe, blurring the background distractions even further.
Water Reflection: It smooths out ripples in puddles or lakes, making reflections look like painted glass.
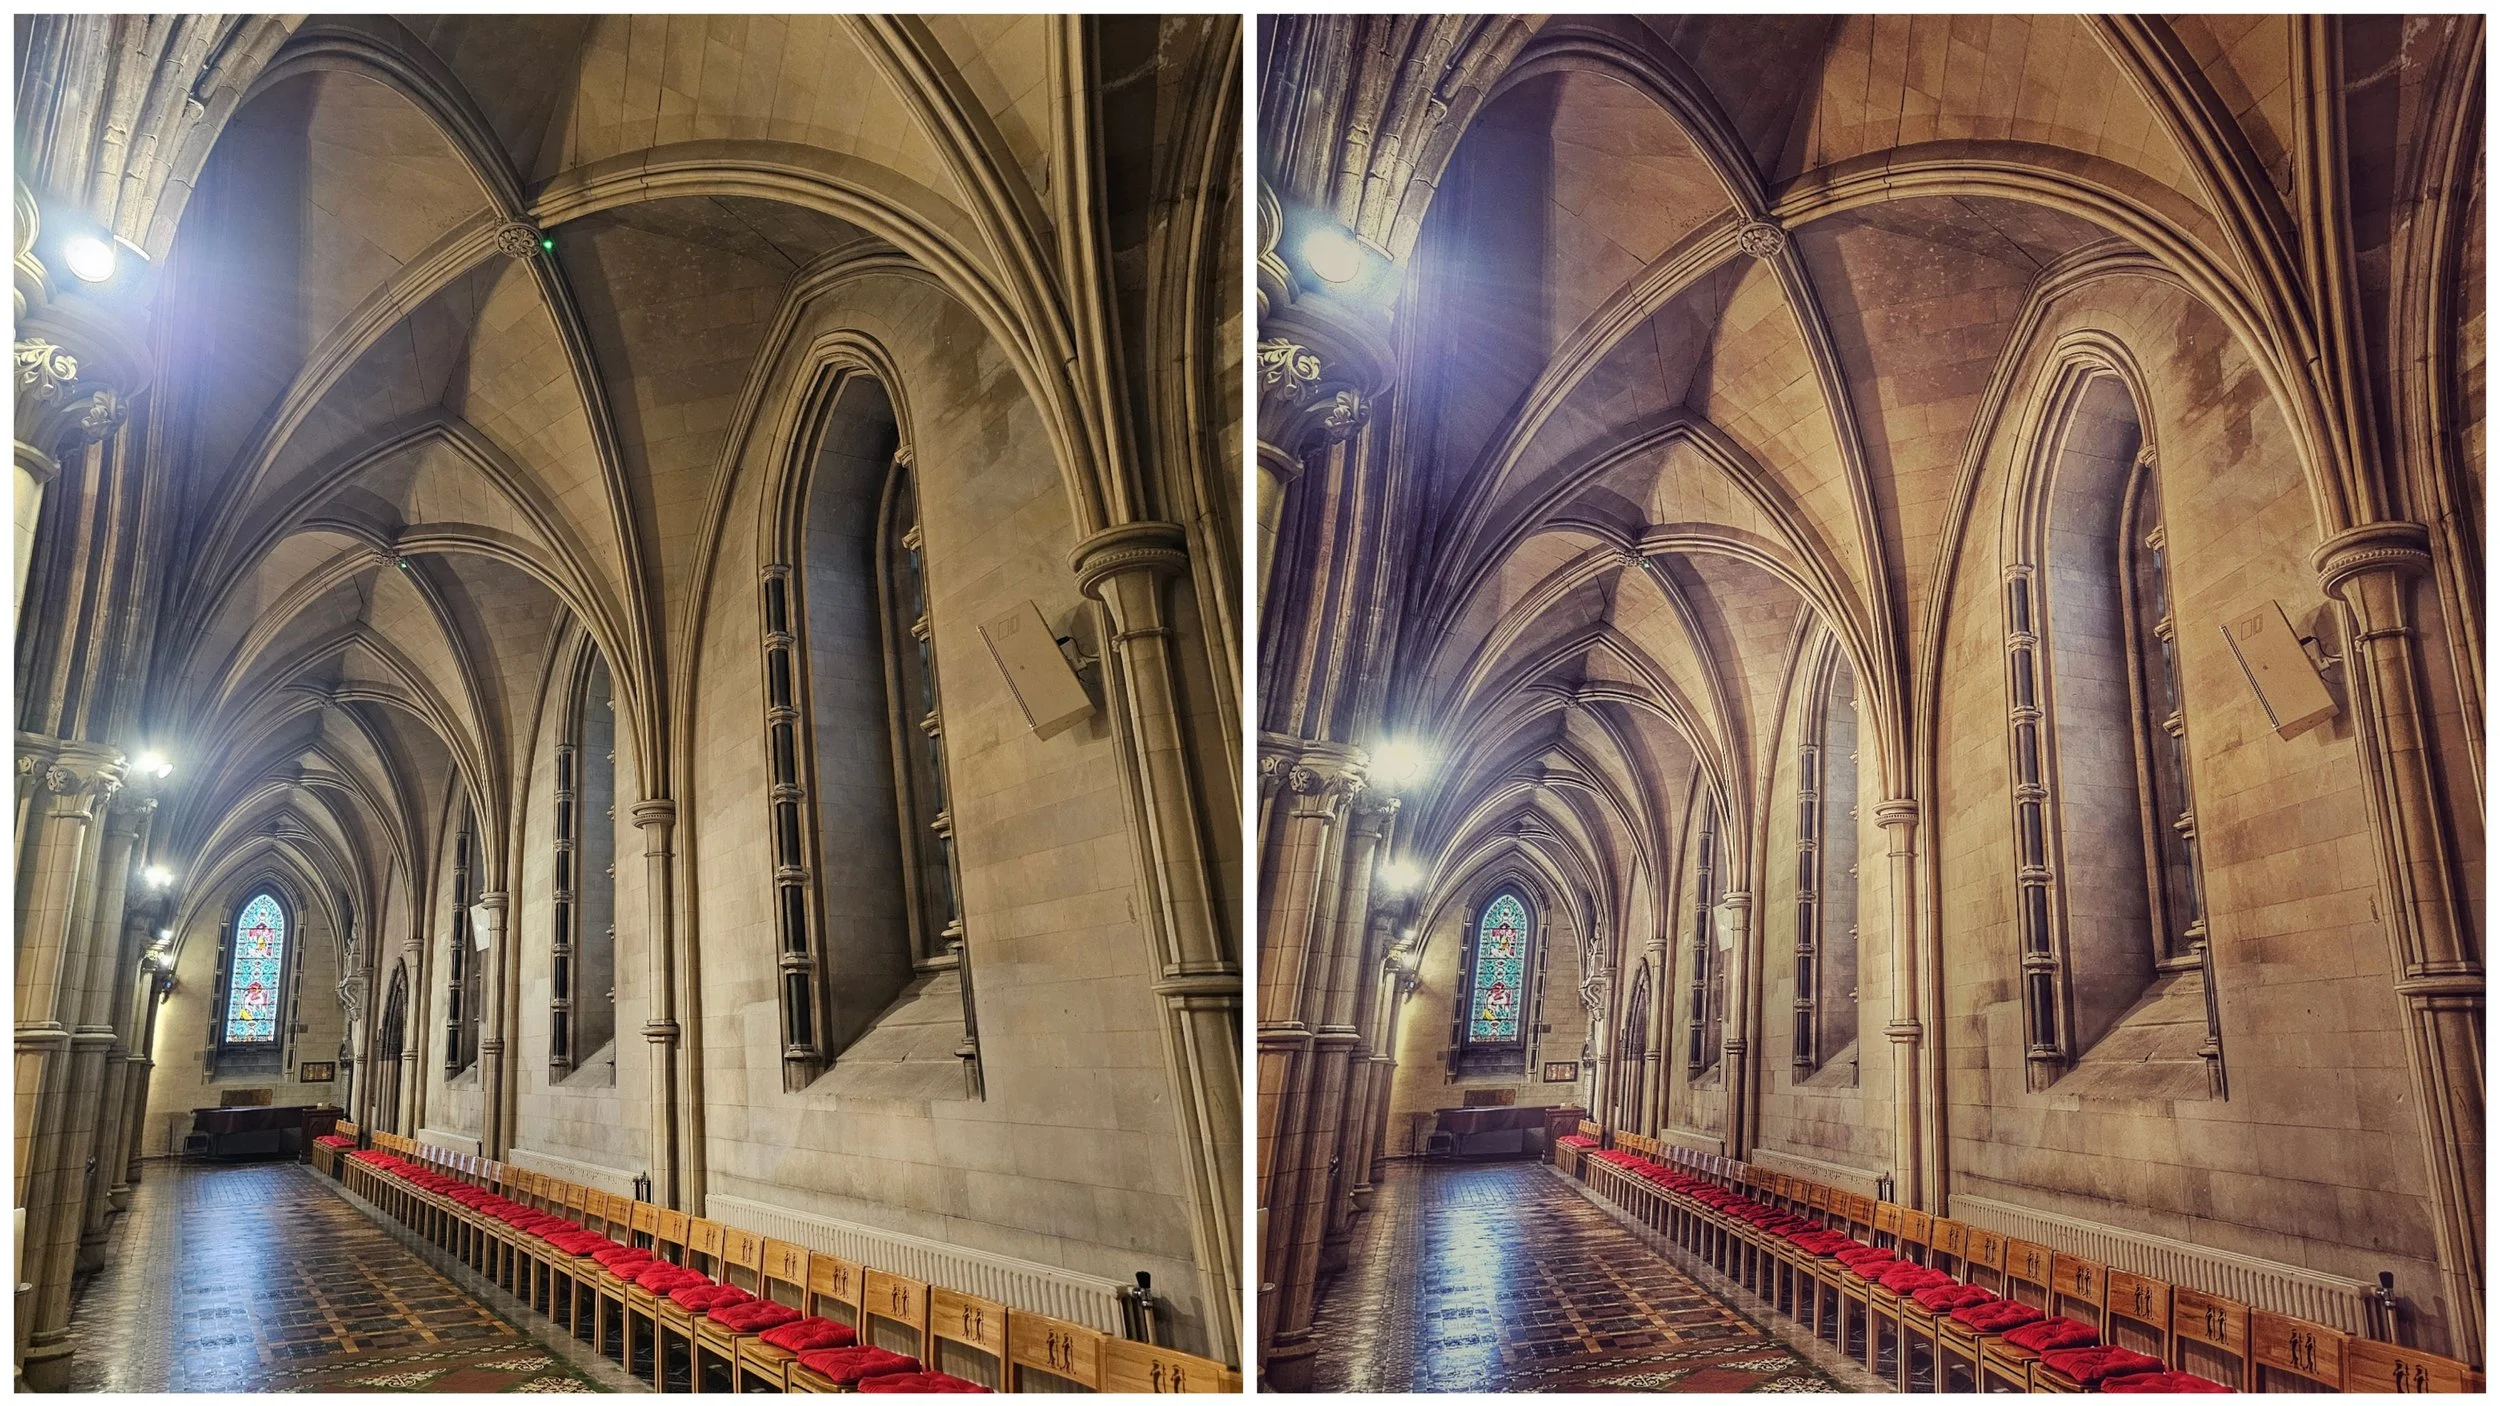
Old Buildings: Sometimes using it on a detailed photo of an old building (particularly stonework) can give the photo a rustic, old-world feeling.
Pro Tip: Don't apply it to the whole image!
After applying Glamour Glow, use the View Edits (stack) icon at the top of Snapseed. Select "Glamour Glow" and choose the Masking Brush.
You can then "paint" the glow only onto the light sources (like the sky or a streetlamp) or the background, while keeping your main subject (like a person or a sharp rock in the foreground) crisp and detailed. This creates depth! I will cover this in another tutorial at a later date - it’s a very useful tool!
Ready to turn your snapshots into art? Give Glamour Glow a try on your next nature walk. If you capture a stunner, I’d love to see it!